10 tips for drawing birds

By LESLIE A. PANFIL
Focused Photos. Work from good photos. You will drive yourself mad trying to discern details from a fuzzy photo. Investing in and learning a good photo editing program will help. While I use Photoshop, Picasa is a free photo editing program. It is fairly easy to use and does the basics.
Originality. A photographer’s work is their work. As an artist who draws from photographs, your job is to interpret the photograph. Take your own photos or use other’s photos as a starting point. You will find your photo editing program will come in handy helping you combine elements from different photos and making compositions that are truly original.
Composition. Understanding the basics of good composition will give your work the balance needed to elevate your drawing to fine art. The intricacies of composition are beyond the scope of this article. But, a great question to start with is: what is my focal point? What do I want people to be drawn to? Placing this element of interest on the page in a pleasing or provocative location is the essence of good composition.
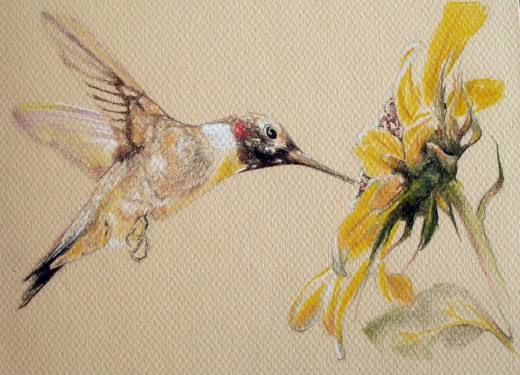
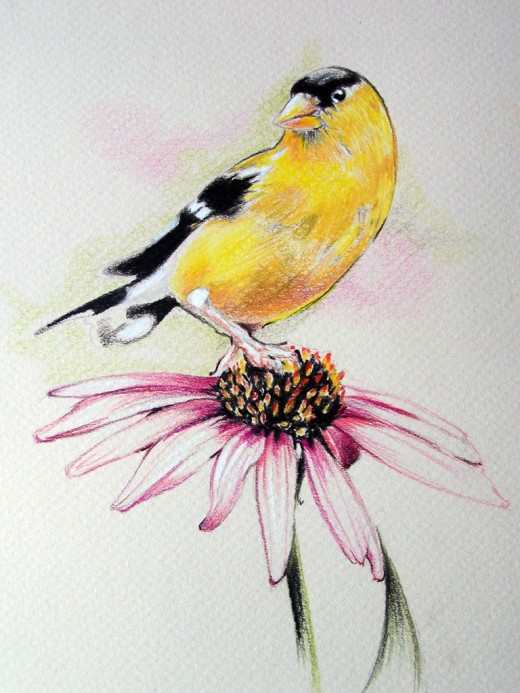
Natural Environment. Do your research and place birds in their natural environment. This means placing them around plants and animals indigenous to their natural habitat.
Relationships. When you have more than one bird in a composition, have them relate to each other. Having birds on random branches looking in different directions can be distracting. How you position birds to each other can communicate a story beyond the mechanical composition of your drawing.
Build it. A cardinal isn’t just red. It is a multitude of reds turning subtly from vibrant scarlet to a muted rustic red. Learn to build color using several colors and rather than hard line to delineate a change in color. Work towards allowing the colors to mingle and merge into one another.
Backgrounds. I prefer to work on colored pastel paper. Choosing either a complimentary colored background or a color predominant in the image you want to render will save you countless hours. When working with white paper, unless you render the entire background, you will run the risk of your focal point floating on the page.
Whites. Working on colored paper makes achieving white highlights a challenge. For the highlights in the eyes I use acrylic paint and a liner brush. Just a tiny dab will do you. The paint can be laid right over the pencil. For other white highlights, I use a white charcoal pencil. It is important to lay down your white charcoal first and work your color in around them. Due to the waxy nature of colored pencils, you will not be able to lay the white charcoal over the pencil with much success.
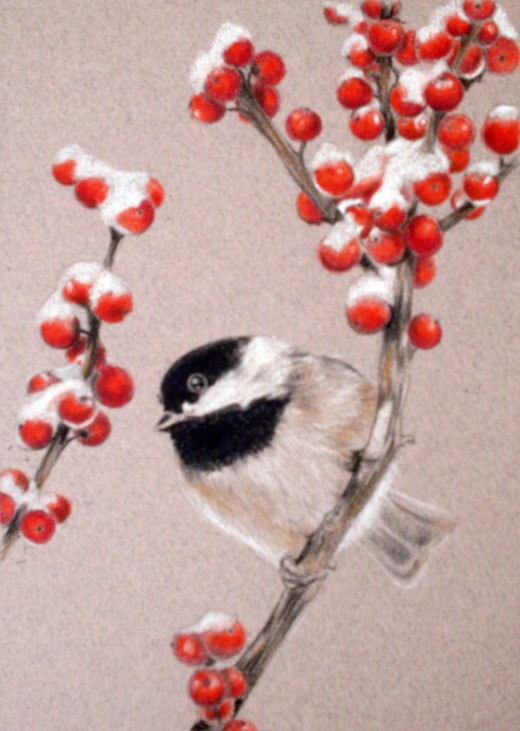
Score it. Create texture by scoring the paper with an embossing tool. This is a really effective way to illustrate the spine of the feather. Use a firm but gentle touch avoiding tearing the paper. I always mount my paper to crescent board and flap to protect my work (see my tutorial.)

Sharpen up. While for accurate drawing, it is a good practice to draw with sharp pencils, it is really important when rendering feathers. By pressing down and then quickly flicking the pencil up in the direction of the feather, you will create the sharp tailored tip of the feather.

The remarkable beauty of nature is a never ending source of inspiration!
More Art Related Articles
- How to Choose Colored Pencils
Stop! Before you purchase a colored pencil set read this valuable article. - 12 Tips for Promoting Your Portrait Drawing Business
Gain more commissions with these business tips. - Turn Your Art Work into Greeting Cards
Learn how to share your art work with family and friends with these handmade greeting cards.
Start Making Money Today by Writing for Hubpages
- HubPages
HubPages is your online space to share your advice, reviews, useful tips, opinions and insights with hundreds of other authors. HubPages is completely free, and you can even earn online ad revenue!